Sunday, September 26, 2021

Slimline Seagulls on Ocean Waves

Today, I decided to have a little fun with seagulls and ocean waves.


The final card measures 3.75" x 8.5". I stamped the seagulls, island and ship images with Memento Tuxedo Black ink on Copic XPress-It Blending Card. I colored them with Copics, then fussy cut them with my Cutter Bees.

I die cut the waves with the Slimline Ocean Motion Die-Namics (My Favorite Things). I used a dark blue cardstock, then lightened the waves with Tumbled Glass Distress Oxide Ink. I used the "wrong" side of the die cuts (the opposite side of the page from the waves) like a stencil and used the Tumbled Glass Distress Oxide Ink to stencil a few more rows of waves on the top and bottom layers.

I layered the waves with foam dots, so there are three levels. I die cut the "WAVES" letters from the MFT Stitched Alphabet die set, using Silver Shimmer Cardstock (Paper Rose). I stamped the "Make Some" words from a sentiment in the MFT Friends with Fins stamp set, then carefully cut it out with scissors. I popped up some of the images with dots, ensuring seagulls were on all three levels. (The seagulls on the bottom level are flat, while the ones on front are popped up, etc.) The sentiment and "WAVES" are also popped up with foam dots.

List of all stamps/dies/stencils used on this card:
  • Seaside Seagulls stamp set (My Favorite Things)
  • Party Like a Pirate stamp set (My Favorite Things)
  • Friends with Fins stamp set (My Favorite Things)
  • Slimline Ocean Motion Die-Namics (My Favorite Things)
  • Stitched Alphabet Die-Namics (My Favorite Things)
Other supplies:
  • Black and blue cardstock
  • Paper Rose Silver Shimmer Cardstock
  • Copic markers (various)
  • Double-sided tape (Scor-tape)
  • Foam dots
  • Memento Tuxedo Black Ink
  • Tumbled Glass Distress Oxide Ink
  • Blending Tool/Foam
  • Copic XPress-It Blending Card 
  • Cutter Bees scissors
Have a lovely day!

Wednesday, September 22, 2021

Cozy Christmas Card

Well, I finished my first Christmas card for 2021! Hooray! I created this card for MFT's Card Superstar contest (coloring category).


The final card measures 4.75" x 6.75". I stamped the fox/chair (Cozy Companions) and bear (Perfect Couple) images on scrap paper and fussy cut them, so I could use them as masks.I stamped the fox/chair on the main card panel, then placed the mask over it. I stamped the tree (Secret Santa), overlapping the fox mask a bit, so the tree would be tucked behind the chair. I stamped the lamp on the other side of the chair.

I stamped the bears on another page of XPress-It Blending Card, then placed the mask over them. I stamped the blanket (Picnic Pals) over the mask, so the bears were sitting on the blanket.

I colored everything with Copics, then fussy cut the bears/blanket. TIP: After you fussy cut an image, run a black marker around the edges, so it hides/covers any uncut white edges. I stamped the sentiment (Christmas Carols) on the main colored panel, then popped up the bears with foam dots so they would have more dimension. I kept everything simple with a black cardstock mat as a frame.

List of all stamps/dies/stencils used on this card:
  • Cozy Companions stamp set (My Favorite Things)
  • Perfect Couple stamp set (My Favorite Things)
  • Secret Santa stamp set (My Favorite Things)
  • Picnic Pals stamp set (My Favorite Things)
  • Christmas Carols stamp set (My Favorite Things)
Other supplies:
  • Black cardstock
  • Copic markers (various)
  • Double-sided tape (Scor-tape)
  • Foam dots
  • Memento Tuxedo Black Ink
  • Copic XPress-It Blending Card 
  • Cutter Bees scissors
Have a merry holiday season!

Sunday, September 19, 2021

Clean and Simple Roses Card

2021 has been a tough year. After my father's passing a few months ago, I haven't felt like crafting or coloring. I decided to pull out my Copics again to make a Clean and Simple (CAS) card for MFT's Card Superstar contest.


The final card measures 5" x 7". I stamped the MFT Fanciful Roses Background on Copic XPress-It Blending Card. The blue flower was incomplete at the top (since it was the edge of the stamp), so I penciled in some finished petals. I colored the two center roses with Copics, then carefully fussy cut them with my trusty Cutter Bees. Once they were fussy cut, I ran a black marker around the edges to hide any white paper.


I cut a 5" x 7" black cardstock panel, then used a stamp from MFT's Flower in Bloom stamp, Versamark ink, and super fine white embossing powder. I layered blue and white cardstock onto a base, then attached the black, embossed panel. I glued the fussy cut roses to the front. Since I was aiming for CAS, I added only a few Aquamarine Swarovski crystals for sparkle.

List of all stamps/dies/stencils used on this card:
  • Fanciful Roses Background stamp (My Favorite Things)
  • Flowers in Bloom stamp set (My Favorite Things)
Other supplies:
  • Black, white and blue cardstock
  • Copic markers (various)
  • Double-sided tape (Scor-tape)
  • Memento Tuxedo Black Ink
  • Clear Versamark Ink
  • Super Fine White Embossing Powder (Ranger)
  • Heat gun
  • Copic XPress-It Blending Card 
  • Aquamarine Swarovski crystals
  • Cutter Bees scissors
Have a lovely day!

Sunday, July 4, 2021

Magical Fawn Card

I've had some beautiful cardstock on the shelf for years (and years... and years...), so I'm trying to get some use out of it. Have you ever purchased cardstock that's "too pretty to cut?" The background for this card is one of those "too pretty to cut" papers:


When I saw the Chibi Fawn 1 digital stamp (Stampers Delights), I thought he would look magically zen with this paper. I printed him on Copic XPress-It cardstock, colored him with Copics, and fussy cut him with scissors.

I cut the paper from the Make Believe Paper Pack (Tattered Lace) to 5.75" x 5.75" (with a 6" x 6" black mat). I stamped a sentiment from the Rosie Fairy stamp set (Kraftin' Kimmie) on white cardstock, then mounted both the fawn and the sentiment on foam dots. That gorgeous background paper made this a super easy card to make!
 
List of all stamps/dies/stencils used on this card:
Other supplies:
  • Make Believe Paper Pack (Tattered Lace, retired)
  • Copic markers (various)
  • Double-sided tape (Scor-tape)
  • Foam dots
  • Black and white cardstock
  • Memento Tuxedo Black Ink
  • Copic XPress-It Blending Card
I hope your day is magical!

Sunday, June 27, 2021

Midsummer Mushroom Hunt Cards

I haven't really felt like creating anything lately, but I decided to play along with Digimojo's Midsummer Mushroom Hunt festivities this weekend. I actually created two cards today, and this is the first one:


The sweet little mushroom girl is Amanita (by Sweet November Stamps), and she comes with two other mushrooms. The lovely background is from the Enchanted Forest Slimline Paper Pack (Whimsy Stamps), and the sentiment is from the You're a Fungi stamp set (Hero Arts). I colored the character and mushrooms with Copics, and then fussy cut them with scissors. I popped up Amanita, a pair of mushrooms, and the sentiment with foam dots. Since the other mushrooms are in the background, I glued them down with Ranger Multi-Medium Matte. (The final card is 8.5" x 3.75".)
 
For the second card, I was playing along with the Glamour Challenge (Faery Ink). I printed the witch image and colored her with Copics. I fussy cut her with scissors, then popped her up with foam dots. I stamped the sentiment on the white cardstock background, mounted the witch image, and added some black, glittery adhesive gems (Jolee's Boutique) for a little sparkle. (The final card is 4.25" x 5.5".)


List of all stamps/dies/stencils used on this card:
Other supplies:
  • Enchanted Forest Slimline Paper Pack (Whimsy Stamps)
  • Copic markers (various)
  • Double-sided tape (Scor-tape)
  • Ranger Multi-Medium Matte
  • Foam dots
  • Black and white cardstock
  • Memento Tuxedo Black Ink
  • Copic XPress-It Blending Card
  • Black, adhesive gems (Jolee's Boutique)
I hope you have a lovely week!

Monday, June 21, 2021

Just Keep Swimming Slimline Card

I wanted to create something bright and happy, and it doesn't get much brighter or happier than a neon-colored underwater scene. I even added Marlin, Nemo and Dory for good measure.


The card is slimline, measuring 3.75" x 8.75".  I stamped a bunch of fish from the MFT "Gill Friends" stamp set on Copic XPress-It Blending Card and colored them with Copics. I fussy cut them with scissors and moved onto the background.
 
The patterned cardstock background is from the Whimsy Stamps "Under the Sea Slimline Paper Pack." I used letters from the LDRS Creative "Sophie Alpha Uppercase" die set to cut out "swimming." In the top left corner, I used Versamark and stamped "Just Keep" from the Hero Arts "Just Keep Swimming" stamp set. I added Ranger Super Fine Detail White Embossing Powder and heat-set the words with my heat gun.

I cut the letters out multiple times out of Gina K "Passionate Pink" cardstock, then glued them together (so each letter was three layers thick). I used a Zig Glue Pen and transparent glitter to coat each letter.

After I created the card base and glued down a mat of the same Gina K paper, I attached the underwater background, then glued on the sparkly letters using Ranger Multi-Medium Matte. I added foam dots to the back of each fish and attached them around the letters.

List of all stamps/dies/stencils used on this card:

  • Gill Friends stamp set (My Favorite Things)
  • Sophie Alpha Uppercase die set (LDRS Creative)
  • Just Keep Swimming stamp set (Hero Arts)
Other supplies:
  • Under the Sea Slimline Paper Pack (Whimsy Stamps)
  • Microfine Transparent Glitter
  • Zig Two-Way Glue Pen
  • Double-sided tape (Scor-tape)
  • Multi-Medium Matte (Ranger)
  • Versafine clear ink
  • Ranger Super Fine Detail White Embossing Powder
  • Heat gun
  • Foam dots
  • Gina K Passionate Pink cardstock
I hope you have a fin-tastic day!

Thursday, June 17, 2021

Happy Florist Slimline Card

I wanted to color something happy this week, to distract my mind from everything else, and I thought this lovely florist met that challenge:

My card measures 3.5" x 8.5". The main image is called The Florist Digital Stamp by Sweet Escape Digis.

I printed her on Copic XPress-It Blending Card and colored her with Copics. I added the white polka dots with a White Sakura Gelly Roll Pen, then fussy cut her with scissors.

My background is simple: a blue cardstock mat and black cardstock background. I stamped the sentiment from the "Little Words that Mean a Lot" stamp set (Elizabeth Craft Designs) with Memento Tuxedo Black Ink and popped it up with foam dots. For the final touch, I added some Swarovski Aquamarine crystals.

List of all stamps/dies/stencils used on this card:

Other supplies:
  • Black, blue and cream cardstock
  • Memento Tuxedo Black Ink Pad
  • Copic XPress-It Blending Card
  • Copic markers (various)
  • White Sakura Gelly Roll Pen
  • Scor-tape
  • Foam dots
  • Swarovski Aquamarine Crystals (2MM, 3MM, 4MM, 5MM)
I hope you have a lovely day!

Friday, June 4, 2021

Close to My Heart Card

I decided to create an encouraging card for one of my aunts this week. I'm always a sucker for a slimline card, so here's the finished project:

My card measures 3.75" x 8.5". The main image is called Heart Digital Stamp by Sweet Escape Digis. I printed her out ages ago (a year, maybe?) and finally got around to coloring her.

I printed her on Copic XPress-It Blending Card and colored her with Copics. I fussy cut her with scissors.

My background is simple: a yellow cardstock mat and black cardstock background. I stamped the sentiment from the "Tweet Friends" stamp set (My Favorite Things) with Memento Tuxedo Black Ink and popped it up with foam dots. For the final touch, I added some Swarovski Sunflower crystals.

List of all stamps/dies/stencils used on this card:

Other supplies:
  • Black, white and yellow cardstock
  • Memento Tuxedo Black Ink Pad
  • Copic XPress-It Blending Card
  • Copic markers (various)
  • Scor-tape
  • Foam dots
  • Swarovski Sunflower Crystals (2MM, 3MM, 4MM, 5MM)
I hope you have a lovely day!

Monday, May 31, 2021

Happy Birthday Cupcake Card

I needed a birthday card, so I decided to play with textures (with Copics, sparkle paste and embossing powder).. I'm also playing along with the current Simon Says Stamp Wednesday Challenge (Anything Goes).

My card measures 5" x 7". The main image is called Teen & Cupcake Digital Stamp by Sweet Escape Digis. I loved how happy and celebratory she looks and wanted to make her the focal point of the card.

I printed her on Copic XPress-It Blending Card and colored her with Copics. I fussy cut her, then began focusing on the background. 

I cut a 4.75" x 6.75" panel of black cardstock, then used Turquoise Sea Gina K Glitz Glitter Gel, a palette knife, and the My Favorite Things Card-Sized Confetti Stencil Set. I layered one of the stencils over the black cardstock and carefully spread the glitz gel with the palette knife. I peeled the stencil away and heat-set everything with my embossing heat gun. 

I cut a 5.5" x 0.75" strip of vellum. I ran my Embossing Buddy across it and stamped the sentiment using Versafine Onyx Black Ink. (The sentiment is from My Favorite Things' Sugar-Coated Sentiments stamp set.) I heat-set it with my embossing heat gun and Ranger Super Fine Detail Clear Embossing Powder.

I layered the girl on my black, glittered cardstock panel, then wrapped the vellum sentiment around her (gluing it to the back of the panel). I attached my finished panel to the front of my card, and the birthday card is ready to go!

List of all stamps/dies/stencils used on this card:

  • Teen & Cupcake Digital Stamp (Sweet Escape Digis)
  • Sugar-Coated Sentiments Stamp Set (My Favorite Things)
  • Card-Sized Confetti Stencil Set (My Favorite Things)
Other supplies:
  • Black, white and turquoise cardstock
  • Turquoise Sea Gina K Glitz Gel
  • Palette knife
  • Embossing heat gun (Chandler Tool Dual Temp)
  • Versafine Onyx Black Ink Pad
  • Ranger Super Fine Detail Clear Embossing Powder
  • Embossing Buddy
  • Copic XPress-It Blending Card
  • Copic markers (various)
Have a sweet day!

Sunday, May 30, 2021

Magical Fairy Card

I was in the mood to color something soft and magical, so I decided to color this lovely fairy and turn her into a card. I'm also playing along with the current Simon Says Stamp Wednesday Challenge (Anything Goes).

This lovely creature is called Lady Fairy, and she's part of a four-pack digital stamp bundle by Sweet Escape Digis.

I printed her on Copic XPress-It Blending Card and colored her with Copics. I fussy cut her, then selected cardstock from an old Tattered Lace paper pack (Make Believe Paper Pack) that I'd had on the shelf for years. I bought it because it was so beautiful, but then I didn't want to use it because it was "too pretty to cut!" Do you ever do that?

I mounted everything on my 5" x 7" card back, with a black cardstock mat behind the background, and popped the fairy up with foam dots. I selected a sentiment from the Poppies of Amethyst (Molly Harrison Art) stamp set and stamped it in Memento Tuxedo Black Ink. I also popped up the sentiment with foam dots. For the final touch, I added some clear Swarovski crystals.

List of all stamps/dies/stencils used on this card:

Other supplies:
  • Make Believe Paper Pad (Tattered Lace) (retired)
  • Memento Tuxedo Black Ink
  • Copic XPress-It Blending Card
  • Copic markers (various)
  • Clear Swarovski crystals (2MM, 3MM, 4MM, 5MM)
Have a magical day!

Saturday, May 22, 2021

Baby Ursula MerMay Card

Well, it's still MerMay, so I've colored another lovely sea creature. I'm pretty sure she'd consider herself a mermaid, even though she has tentacles. I couldn't resist this beautiful illustration of the infamous sea witch as a baby. People may underestimate her when she's this young... oh, those poor, unfortunate souls!

This beautiful illustration is a digital stamp called "Baby Ursula" (by Digistamp Atelier on Etsy). I never color pre-shaded images because I rarely agree with the shading (and want to define my own light source), but it was worth fighting against the pre-shading to bring some color to Ursula.

I printed her on Copic XPress-It Blending Card and colored her with Copics. I fussy cut her, then selected cardstock from an old Little Mermaid: Disney Princess Paper Pad (by Character World) that I'd had on the shelf for years. I stamped the sentiment (by Art Impressions) in Tuxedo Black Ink on the background before assembling everything.

Once I finished my 5" x 7" card, I couldn't resist adding some Swarovski crystals. After all, she becomes queen of the ocean (for a very short while, anyway). She deserves some sparkles!

List of all stamps/dies/stencils used on this card:

Other supplies:
  • Little Mermaid: Disney Princess Paper Pad (Character World) 
  • Memento Tuxedo Black Ink
  • Copic XPress-It Blending Card
  • Copic markers (various)
  • Clear Swarovski crystals (2MM, 3MM, 4MM, 5MM)
Have a beautiful day under the sea, under the sea...

Sunday, May 16, 2021

Stay Salty Mermaid Card

Last year, I colored a ton of mermaids during MerMay, so I haven't felt like coloring any more for a while. It's MerMay again, so I figured I should color at least ONE in 2021. I'd purchased and printed this lovely mermaid nearly a year ago, so it's time to color her up!

This lovely sea lady is a digital stamp called "Mermaid Lovely" (by KristaSmithStamps on Etsy). I printed her (last year) on Copic XPress-It Blending Card.

Before I began coloring, I stamped a sentiment from the May 2021 My Monthly Hero Kit (Hero Arts) with Memento Tuxedo Blank Ink, so I wouldn't color over that spot. I grabbed my Copics and colored her in warm brown, gold and red tones.

I finished the card by trimming the colored panel to 4"  x 5.25" and mounted it on a piece of black cardstock. I added a few clear, glass drops for some texture.

List of all stamps/dies/stencils used on this card:

Other supplies:
  • Memento Tuxedo Black Ink
  • Copic XPress-It Blending Card
  • Copic markers (various)
  • Clear glass drops
Have a fintastic day!

Friday, May 14, 2021

Floating Through the Clouds Card

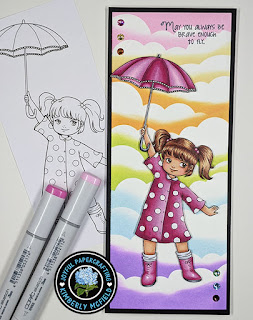
Today, I'm playing along with two cardmaking challenges: the Simon Says Stamps' Wednesday Challenge (Stencil It) and the Lemon Shortbread Challenge #145 (Anything Goes). Here is today's card, inspired by Mary Poppins' magical umbrella:


The card is slimline, measuring 3.5" x 8.5".  I printed the Polka Dot Raincoat digital stamp (Lemon Shortbread) on Copic XPress-It Blending Card and colored the image with Copics. I fussy cut the image with scissors and moved onto the background.
 
I stencils the rainbow clouds using the MFT Cloud Stencil, blending tools, and Distress Oxides (Kitsch Flamingo, Scattered Straw, Dried Marigold, Citron, Tumbled Glass, and Wilted Violet) onto an 8.25" x 3.25" piece of white cardstock.

I stamped the sentiment from the Butterfly Sentiment Set (Stamping Bella) using Memento Tuxedo Black Ink. Before attaching the girl, I decided she needed a little sparkle, so I used a Zig Two-Way Glue Pen and microfine transparent glitter on the white polka dots. I attached her to the card with foam dots, then glued on a rainbow of Swarovski crystals, just for a little more bling.

List of all stamps/dies/stencils used on this card:

Other supplies:
  • Black and white cardstock cardstock
  • Microfine Transparent Glitter
  • Zig Two-Way Glue Pen
  • Double-sided tape (Scor-tape)
  • Swarovski crystals (various colors, 5MM)
  • Multi-Medium Matte (Ranger)
  • Memento Tuxedo Black Ink
  • Foam dots
  • Distress Oxides: Kitsch Flamingo, Scattered Straw, Dried Marigold, Citron, Tumbled Glass, and Wilted Violet
  • Blending tool and foam rounds
I hope you have a lovely, magical day!

Friday, May 7, 2021

Mother's Day Floral Card

Today, I'm sharing a special Mother's Day card I made for my sister. She is such a fantastic mother to my nephew, and I'm so proud of her. I am also playing along with the Simon Says Stamp Monday Challenge and the Simon Says Stamp Wednesday Challenge (since both had the same theme: "Feminine").

 The beautiful floral image and sentiment are from the Happy Mother's Day Digital Stamp Bundle by Graciellie Design. Since these are digital stamps, I sized everything to fit a 6" x 6" square card.

This card is fairly straightforward and simple. I printed the flowers/sentiment on Copic XPress-It Cardstock and colored everything with Copics. When I was done, I trimmed the page to 5.75" x 5.75" and mounted it on some deep blue/purple cardstock that matched the vase. I adorned the card with a few Swarovski crystals for sparkle. 

Inside the card, I stamped a butterfly from the Beautiful Butterflies clear stamp set (Simon Says Stamp), which I stamped with Memento Tuxedo Black Ink. I also colored the butterfly with Copics, using the same purple/blue and yellow colors I used on the flower. I stamped the sentiment from the Curvy Girl Boy Mom stamp set (Stamping Bella) and mounted the panel inside the card, along with a mat of matching blue/purple polka dot paper (from My Favorite Things). Here is the inside:

List of all stamps/dies/stencils used on this card:

Other supplies:
  • Memento Tuxedo Black Ink
  • Copic XPress-It Blending Card
  • Copic markers (various)
  • Clear Swarovski crystals
Have a wonderful day!

Friday, April 23, 2021

Missing You Kitties in a Window

Today, I created a fun slider card with a surprise in the window. I'm also playing along with Simon Says Stamps' Monday Challenge (Using Bright, Cheerful Colors).

After making the slider racetrack birthday card for my nephew, I had another idea for using the double-slider loop mechanism. Creating movement with the mechanism gets easier with practice, but I made it more challenging by using extra-wide panels, which required a wider loop. Here is the front of the card, as well as the front after you pull the tab down:

The kitties are so happy to see you, even through a window! 🐱 If you want to see the slider in action, here's a video:

My card measures 5" x 7". I used the MFT Window Dressing die to create the window, then decided I wanted it to be twice as wide, so I used the die side-by-side. Once I decided on my layout, and the size of the window, I created a rectangular block of kitties by masking and stamping.I used MANY stamp and die sets for this card, so I've listed them at the bottom of this post.

Once I stamped my window-sized block of kitties, plus additional cats and die-cut plants/shelves for the foreground, I colored them with Copics. I fussy cut all of the animals with scissors. I also die cut the curtains and curtain rod from the Window Dressing die set, then encountered another problem: my window was too wide for the rod. I fixed this by slicing the paper rod in half and then cutting a skinny piece of gold cardstock for the rod itself. Once I added the knobs at each end, and placed the curtains over the areas that showed the seams of my layered, single piece of skinny cardstock, it looked perfect.

I cut a piece of clear acetate for the window pane, attached it to the back of the panel, then glued two skinny, white strips to the top and bottom (for the window edges). I cut the "wallpaper" from the MFT Wallpaper Patterns paper pad, the curtains from the Lawn Fawn Really Rainbow Scallops paper pad, and the wooden floor from an old Stampin' Up paper pack. It was a challenge to cut the windoww-sized hole in the wallpaper, since I made it a custom size, but I figured it out (and the white strips covered any flaws). I trimmed the curtains down so they were skinnier and would fit onto the card without blocking the window.

Once I completed the front, without adding the extra characters yet, I tackled the mechanism. I used the MFT Double Slider Loop Slots die set, but since my kitty panel and pull tab were wide, I cut the hole three times with the shortest die. This created a wide hole, which provides more stability. I created the loop out of a plastic sheet protector. (Tip: Sheet protector sleeves are awesome for these, as they don't have the sharp edges down the sides like Ziploc baggies, which tend to get stuck in the loop.) I used my Tim Holz Tiny Attacher Stapler to close the loop, then to attach the pull tab on the back side and kitties on the front side. The interior mechanics look like this:


In the top photo, you can see the wide panel of kitties stapled to the front side of the slider loop. The second photo shows the cavity underneath, where the pull tab panel is attached in the same way. The foam layers provide space for the loop to move easily.

If you'd like to see exactly how a double slider loop is constructed, I recommend watching My Favorite Things' Double Slider Loop Slots Die-Namics video on their product page.

I used Stampin' Up Foam Adhesive Strips between each layer, so the slider would have enough room to move easily. I cut a white card base and black mat for the front, then attached all of my layers: bottom layer (country scene from the Tattered Lace Country Manor Paper Pack), middle layer with double slider loop, then top layer with window/curtains. I added my characters, plants and perches using Ranger Multi-Medium Matte and foam dots.

For the inside of the card, I wanted a simple, large paw print, but I didn't have a stencil. Instead, I used the MFT Paw Prints Die-Namics to MAKE a stencil, by cutting the large shape out of a black piece of paper. I used my blender brush and teal ink to stencil the paw print inside. I will add a sentiment once I figure out to whom and why I'm sending the card.


List of all stamps and dies used on this card:
  • Housecats stamp set (My Favorite Things)
  • I Knead You stamp set (My Favorite Things) 
  • Cool Cat stamp set (My Favorite Things) 
  • Housecats Exclusive stamp set (My Favorite Things)
  • Houseplants Die-Namics (My Favorite Things)
  • Cat & Plant Perches Die-Namics (My Favorite Things)
  • Window Dressing Die-Namics (My Favorite Things) 
  • Paw Prints Die-Namics (My Favorite Things)
  • Double Slider Loop Slots Die-Namics (My Favorite Things)
  • Interactive Labels stamp set (My Favorite Things) (to stamp "pull" and the arrow on the tab)
  • Word Mix 2 stamp and die set (Simon Says Stamp)

Other supplies:

  • Copic markers (various)
  • White, black and teal cardstock
  • Double-sided tape (Scor-tape)
  • Foam Adhesive Strips (Stampin' Up)
  • Multi-Medium Matte (Ranger)
  • Memento Tuxedo Black Ink
  • Clear sheet protectors
  • Tim Holtz Tiny Attacher Stapler
  • My Favorite Things Wallpaper Patterns Paper Pad
  • Lawn Fawn Really Rainbow Scallops Paper Pad
  • Tattered Lace Country Manor Paper Pack
  • Stampin' Up 6"x6" wood-pattern cardstock
  • Cutter-Bees scissors
I hope you enjoyed this project, and I look forward to hearing your thoughts!

Happy Crafting!

Thursday, April 1, 2021

Slimline Racecar Slider Birthday Card

Today, I've created a special birthday card for my four-year-old nephew. I'm also playing along with Simon Says Stamps' Wednesday Challenge (Anything Goes).

This was the second time I've made a card with a double-slider loop mechanism. (The first was on my fishbowl card.) I thought it would be easier the second time, but it was just as challenging, especially adjusting for the slimline size. Here is the front of the card, as well as the front after you pull the tab:


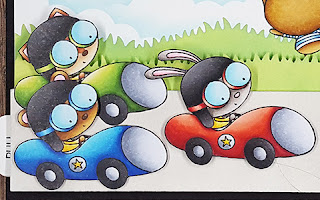
My card measures 4" x 8.5", and all of the characters are from the Fast-Track Friends stamp set (My Favorite Things). Since we read from left to right, I wanted the racers to face right, so I used a mirror stamp (Mirror Block by Paper Smooches) to turn them around. When you mirror stamp, you use an acrylic block to stamp the image directly onto the mirror stamp (either mounted on another acrylic block or on your stamp positioner tool), and then you stamp the mirror stamp onto your paper. I did that three times, so I would have three racers.

Once I stamped the racers, I decided that I wanted them to be different animals, not all bunnies. I colored all of the characters with Copic markers. I used creative color placement, as well as stamped ears from other characters in the stamp set. Once I fussy cut them with scissors and glued the new ears on them, I had three distinct racers (bunny, fox and bear)!


I stamped the other characters, masking the middle character (with the sign) so I'd have them together in a group. I colored and fussy cut them. I also stamped, colored and fussy cut the bear and tires for the inside of the card.

To build the scene, I cut a 3.75" x 8.25" white panel and used the Slimline Cloud Edges stencil (MFT) with Tumbled Glass Distress Oxide. I cut other panels from white cardstock, using the Slimline Grassy Hills dies, as well as a 1.75" x 8.25" strip for the race track. I used Mowed Lawn and Twisted Citron Distress Oxides on the grass layers, then Pumice Stone Distress Oxide on the race track, masking off a 1.6" section for the finish line. I used a ruler, pencil, and Copic marker 100 to create the checkered finish line.

Next, I assembled the slider loop mechanism (using the Slimline Starter Die-Namics) and attached the layers together, using SU Foam Strips for the moving layers and Scor-tape for the other layers. This is how the card moves:


My Favorite Things provides an instruction video for the Slimline Starter Die-Namics (with double-loop slider) on their website, and I followed those instructions to create the slider loop on my card. HOWEVER, I had to make one very, very important deviation: the plastic loop itself!

In the video, the artist uses a strip cut from a large (freezer) Ziploc bag. That did not work at ALL for me, as the slimline size is so long that any strip you cut will have a seam, and the seam gets stuck in the holes!! I fought with it for at least 20 minutes before I started searching in my craft room for alternatives, and I finally settled on the Simon Says Stamp Slimline Clear Bags. These are clear, plastic bags that you use to protect/store your slimline cards... and, most importantly, the bottom of the bag is just folded/pressed, NOT a seam! I cut my strip vertically from the bag and substituted it for the Ziploc bag in the video. It worked perfectly and slides smoothly! This is definitely a trick I'll remember for any future slimline slider cards.

I finished the inside of the card with several layers of cardstock and the other images I stamped, colored with Copics and fussy cut. Here's the inside:


List of all stamps and dies used on this card:
  • Fast-Track Friends stamp set (My Favorite Things)
  • Mirror Block stamp set (Paper Smooches, retired) 
  • Slimline Starter Die-Namics (My Favorite Things) 
  • Slimline Grassy Hills Die-Namics (My Favorite Things)
  • Slimline Cloud Edges stencil (My Favorite Things)
  • Interactive Labels stamp set (My Favorite Things) (to stamp "pull" on the tab)

Other supplies:

  • Copic markers (various)
  • White, black and red cardstock
  • Double-sided tape (Scor-tape)
  • Foam Adhesive Strips (Stampin' Up)
  • Multi-Medium Matte (Ranger)
  • Memento Tuxedo Black Ink
  • Slimline Clear Bags (Simon Says Stamp) 
  • Distress Oxides: Mowed Lawn, Twisted Citron, Tumbled Glass, Pumice Stone
  • Cutter-Bees scissors
I hope you enjoyed this project, and I look forward to hearing your thoughts!

Happy Crafting!

Monday, March 22, 2021

Slimline Spring Bunnies Card

Today, I'm playing along with two cardmaking challenges: My Favorite Things' Wednesday Sketch Challenge #533 and the Simon Says Stamps' Monday Challenge (Whatever the Weather). Here is my springtime bunny card:


I used dies, Distress Oxides, and a stencil to create this simple, springtime bunny card. The card is slimline, measuring 3.5" x 8.5".  First, I cut my 3.5" x 8.5" white panel and used the MFT Slimline Cloud Edges Stencil (Tumbled Glass Distress Oxide). I stamped the sentiment on the top left corner using MFT's A Very Sweet Somebunny and Memento Tuxedo Black Ink.
 
Next, I cut three slopes to mirror the MFT sketch challenge. For the top and bottom hills, I used MFT's Slimline Grassy Hills Die-Namics. For the second slope, with the bunnies, I used the Paper Rose Slimline Bunny Border die. I used Mowed Lawn and Twisted Citron Distress Oxides to blend the ink on the grass, masking the bunnies so I could glitter them later.

Once my hills dried, I removed the masks over the bunnies and used Microfine Transparent Glitter with a Zig Glue Pen. It's hard to tell in the picture, but the bunnies are SUPER sparkly! 

I attached of the layers to the card base, then glued on some gold sparkle crystals (Studio Katia) for some bling.

List of all stamps/dies/stencils used on this card:

  • Slimline Grassy Hills Die-Namics (My Favorite Things)
  • Slimline Cloud Edges Stencil (My Favorite Things)
  • Slimline Bunny Border Die (Paper Rose)
  • A Very Sweet Somebunny Stamp Set (My Favorite Things)
Other supplies:
  • White cardstock
  • Microfine Transparent Glitter
  • Zig Two-Way Glue Pen
  • Double-sided tape (Scor-tape)
  • Gold Sparkle Crystals (Studio Katia)
  • Multi-Medium Matte (Ranger)
  • Memento Tuxedo Black Ink
Happy Spring!

Sunday, March 21, 2021

Slimline Birthday Wish Card

Today, I'm playing along with three cardmaking challenges: My Favorite Things' Wednesday Sketch Challenge #533, My Favorite Things' Slimline Challenge - Inside Out, and the Simon Says Stamps' Wednesday Challenge (Use 2 or More Patterned Papers). Here is the front of this week's card:


I used patterned papers, dies, and a few Copics to create this birthday card. It's slimline, so it measures 3.5" x 8.5". Since the MFT Slimline Challenge was to use a die to give a glimpse of a special feature inside, here's the inside of the card: 

You can see the pattern of the balloon through the "WISH" window on the front of the card!

This was a simple card, but it required a lot of cutting. I cut my Wisteria Wonder card base at 7" x 8.5" and my Licorice Black card front at 3.5" x 8.5". Before attaching the card front, I used my die machine to cut the "WISH" window, then glued it to the card base. I ran the card base through the machine, cutting the "WISH" through the Wisteria card base.

Next, I cut three different patterned cardstock panels (4.25" x 3.5", 3.25" x 3.5", and 2.25" x 3.5") from the MFT Party Patterns Paper Pack. I used the Stitched Scallop Basic Edge Die-Namics (MFT) to cut slopes that resembled Sketch Challenge #533. Finally, I glued the layers to the card front, carefully leaving the scalloped tops of each piece unglued, so I could slip my candles behind the paper.

I used a beautiful, white-and-gray lacy & glittered cardstock from my stash and cut out the candles (Happy Birthday Candles Die-Namics). I wanted to be able to color the flames with Copics, so I cut the flames out of Krazy Kreations Velvet Smooth Glitter Paper (Warm Highlights). I staggered and glued each candle to the front of the card, tucking the bottom of the candles behind the scalloped paper. After I glued on all of the flames, I used Copics R17 and Y15 to color the flames.

In order to meet the slimline challenge, I needed to have something special inside. I cut the balloon (Perfect Fit Balloon Die-Namics) out of MFT patterned paper (same book as the others), then again out of Licorice Black cardstock. I glued the patterned balloon on top of the black one, offsetting the bottom one a bit to create a black outline for the patterned balloon. I glued the balloon onto a 3.25" x 8.25" white cardstock panel, then attached the string (cut from black cardstock) with the Multi-Medium Matte glue. I wanted something sparkly, so I cut a bow (from Blueprints 26 Die-Namics) out of the KK Glitter paper, then colored it with RV32 to match my patterned paper. I glued it over the balloon valve, and my card was done!

List of all stamps/dies/stencils used on this card:

  • Wish Die-Namics (My Favorite Things)
  • Stitched Scallop Basic Edge Die-Namics (My Favorite Things)
  • Happy Birthday Candles Die-Namics (My Favorite Things)
  • Perfect Fit Balloon Die-Namics (My Favorite Things) 
  • Blueprints 26 Die-Namics (My Favorite Things)
Other supplies:
  • Party Patterns Paper Pack (My Favorite Things
  • Wisteria Wonder cardstock (Stampin' Up)
  • Licorice Black cardstock (My Favorite Things)
  • Velvet Smooth Glitter Paper - Warm Highlights (Krazy Kreations)
  • Whisper White cardstock (Stampin' Up)
  • Double-sided tape (Scor-tape)
  • Copic markers (R17, Y15, RV32)
  • Multi-Medium Matte (Ranger)
I wish you a very happy week!

Monday, March 15, 2021

Fawn and Bunny - You Complete Me

Today, I'm playing along with the My Favorite Things' Wednesday Sketch Challenge #532 and the Simon Says Stamps' Wednesday Challenge (Bit 'O Green).

This is a fairly simple card. I typed and printed the sentiment from my computer, then cut out the stitched rectangle (Lawn Fawn) around it. I stenciled the puzzle pieces using Distress Oxides and a Create-a-Smile stencil, masking the edges to keep them clean. I cut a stitched circle (Lawn Fawn) and stamped the fawn and bunny, masking around the edges to keep all images within the stitching.

After that, I quickly colored the scene with Copics and used the MFT Mini Cloud Edges as a guide for my Copic-colored sky. I glued everything together and popped up the sweet scene with foam dots.

List of all stamps/dies/stencils used on this card:

  • A Very Sweet Somebunny Stamp Set (My Favorite Things)
  • Puzzle Stencil (Create-a-Smile)
  • Stitched Rectangle Stackables Dies (Lawn Fawn)
  • Stitched Circle Stackables Dies (Lawn Fawn)
  • Mini Cloud Stencil (My Favorite Things)
Other supplies:
  • White cardstock (Neenah Solar white)
  • Double-sided tape (Scor-tape)
  • Copic markers (various)
  • Distress Oxide Inks: Salty Ocean and Mermaid Lagoon
  • Foam dots
Have a sweet day!

Saturday, March 13, 2021

Purple Ombre Orchid Sympathy Card

Today, I'm playing along with the Simon Says Stamps' Wednesday Challenge (Bit o Green) and the Simon Says Stamps' Monday Challenge (Use Something Green). Sadly, I've needed many sympathy cards during 2021, so I'm rebuilding my supply (and hoping I won't need them again for a while).


This card is slimline (3.5" x 8.5"). The beautiful floral image and sentiment are by Graciellie Design (Words of Hope Mega Stamp Set and Healing Prayers). I decided to play with ombre, coloring the flowers from lightest to darkest. I fussy cut the image with scissors and focused on the background.

I found am ombre purple cardstock and complementary light lavender cardstock in my stash. I used the Pink & Main Plaid Slimline Die on the light lavender cardstock. I die-cut the sentiment with a die from the Layering Ovals Framelits set (Stampin' Up). Once I was done, I added a few Amethyst Swarivski crystals, gluing them down using Ranger Multi-Medium Matte (which dries clearly).

List of all stamps/dies/stencils used on this card:

Other supplies:
  • White, purple ombre and light lavender cardstock
  • Double-sided tape (Scor-tape)
  • Ranger Multi-Medium Matte 
  • Tape Runner
  • Copic markers (various)
  • Swarovski crystals (Amethyst)
  • Foam dots
Have a rainbow-tastic day!


Saturday, March 6, 2021

Rainbow Floral Card

Today, I'm playing along with the Simon Says Stamps' Wednesday Challenge (Beautiful Blossoms). I've been itching to do a floral card in rainbow colors. I have a lot of stress in my life right now, and coloring for a few minutes each day this week really helped. The card is FINALLY done!

This card is slimline (3.5" x 8.5"). The beautiful floral image is by Graciellie Design (Mini Faith Digital Stamp Bundle). It took me all week to color the flowers with Copics, especially since I came up with the color combos on the fly. (I usually color for an hour or so each day.) When I finished coloring, I used a white gel pen (Sakura Gelly Roll) to add white dots in the center of each flower. I fussy cut the image with scissors and focused on the background.

I usually use a solid background, but I thought the rainbow plaid matched perfectly. I used the Pink & Main Plaid Slimline Die and cut out a white plaid panel to layer above the cardstock. After I glued everything together, I added 6 Swarovski crystals (5MM), each in a color that matched the flowers.

List of all stamps/dies/stencils used on this card:

Other supplies:
  • White cardstock
  • Rainbow Plaid cardstock (Lawn Fawn)
  • Double-sided tape (Scor-tape)
  • Ranger Multi-Medium Matte 
  • Tape Runner
  • Copic markers (various)
  • Swarovski crystals (5MM, various colors)
  • White Sakura Gelly Roll Pen
Have a rainbow-tastic day!

Sunday, February 28, 2021

Eucalyptus and Cotton Bouquet Card

Today, I'm playing along with the Simon Says Stamps' Wednesday Challenge: Anything Goes. I felt like coloring something happier, like a floral arrangement, so I colored this lovely image by Graciellie Design.

The main image (eucalyptus and cotton) is from the Simply Blessed Digital Stamp Set by Graciellie Design. Since these are digital stamps, I took a sentiment from another Graciellie set (Your Kindness) and added it next to the vase

This is a 5" x 7" card, and fairly straightforward and simple. I printed the flowers on Copic XPress-It Cardstock and colored everything with Copics. Since I'd already added the sentiment before printing, I just finished it with a few Clear Swarovski crystals for sparkle.

List of all stamps/dies/stencils used on this card:

Other supplies:
  • Memento Tuxedo Black Ink
  • Copic XPress-It Blending Card
  • Copic markers (various)
  • Clear Swarovski crystals
I hope you have a lovely day!

Saturday, February 20, 2021

Healing Hugs Card

I've struggled to make cards lately, as all of the occasions for them seem to be sad. I was able to finish two of these, each for one aunt in the hospital. I am also playing along with Simon Says Stamps' Monday Challenge: Add Some Texture (using pop dots and adding crystals) and Wednesday Challenge: Favorite Technique (Copic coloring).

On the day my uncle went into hospice, his wife (my aunt) fell and shattered several ribs. Around that time, my other aunt was dropped by the nursing home staff, and she broke her leg. I made one of these cards for each of them, hopefully to send a little sunshine and healing thoughts.

This card measures 5" x 6.5". The adorable little girl with her bear is the Wryn - Loving Teddy Bears digital stamp (Tiddlyinks). I printed her on Copic XPress-It Blending Card, then colored her with Copics. After I finished coloring, I fussy cut her and added foam dots to the back of her, so she'd be popped up on the card.

I stamped the sentiment ("Hug It Out" by My Favorite Things) and popped it up with foam dots. The patterned papers are by My Favorite Things (Party Plaid paper pad) and Stampin' Up (wood texture, retired).

Inside the card, I stamped another MFT sentiment ("Friends Like Us" stamp set) and hugging bunnies ("Peach and Piper" by Picket Fence Studios). I quickly colored the bunnies with Copics, then used another MFT plaid from the paper pad for the inside layering background. This is the inside of the card:

I added a few Aquamarine Swarovski crystals to the card front for a little more texture and bling.

List of all stamps/dies/stencils used on this card:

Other supplies:
  • Copic XPress-It Blending Card
  • Copics (various)
  • Party Plaid paper pad (My Favorite Things)
  • White and blue cardstock (any brand)
  • Ranger Glossy Accents
  • Double-sided tape (Scor-tape)
  • Foam dots
  • Aquamarine Swarovski flat-backed crystals (3MM, 4MM, 5MM)
I hope you're having a lovely day!

Thursday, February 4, 2021

Floral Sympathy Cards

I've made many sympathy cards before, but this is the first time I've made them for the passing of someone close to me (vs. sympathy for a friend who lost a loved one). My uncle passed away a week ago. I had the hardest time starting the card, as well as figuring out how everything should go together.

This card measures 4.25" x 5.5". I used Memento Tuxedo Black Ink to stamp the flower (Dotted Blooms by Altenew) and sentiment (Deepest Sympathy by My Favorite Things). I quickly colored the flowers with Copics, using purple and yellow color schemes. 

I die-cut the butterfly (Layered Butterfly by Technique Tuesday) out of glittered cardstock and vellum (for the back layer). I glued the layers together and attached it to the card front with Ranger Multi-Medium Matte.

For the inside, I stamped the sentiment (Floral Sympathy by My Sentiments Exactly) and flower (Rose Garden by My Favorite Things) and colored the flower to match the card front. After I glued all of the layers together, I added a few Swarovski crystals (Jonquil and Clear).

List of all stamps/dies/stencils used on this card:

  • Dotted Blooms stamp set (Altenew)
  • Deepest Sympathy stamp set (My Favorite Things)
  • Layered Butterfly die set (Technique Tuesday) 
  • Floral Sympathy stamp set (My Sentiments Exactly)
  • Rose Garden stamp set (My Favorite Things)
Other supplies:
  • Copic markers (various)
  • Tuxedo Black Ink (Memento)
  • White cardstock (Stampin' Up) 
  • Yellow and periwinkle cardstock (Recollections)
  • Ranger Multi-Medium Matte
  • Glittered cardstock (teal and silver)
  • Double-sided tape (Scor-tape)
  • Vellum cardstock (Recollections)
  • Swarovski crystals: Jonquil and Clear/Crystal (3mm, 4mm, 5mm)
I hope you all are doing well and staying healthy!

Monday, January 25, 2021

Bookmarks and a Pretty Bag

When I was bundling up everything for my colleagues (for our team building event), I decided to make one more little gift. We often receive physical (not digital) books to read for work, so I made each lady a bookmark. I created them in three colors: pink, purple, and blue.


The colors are actually more vibrant in person, but they didn't photograph well. I cut 2" x 6" strips of Neenah Desert Storm and used the Stampin' Up Fancy Tag Topper Punch. Next, I stamped the "Behind Every Successful Woman" (Riley & Co.) sentiment with Memento Tuxedo Black Ink. Finally, I stamped the "Sweet Cluster" stamp (Altenew) on the top and bottom of the bookmarks. I colored the flowers with Copics, added matching, patterned paper to the back (to make them sturdy, not shown), and added a white tassel. 

I needed to put everything into bags for each lady, so I can drop them on doorsteps tomorrow. I wanted to make the bags as pretty as possible, so I grabbed Kraft gift bags (10" tall) and stenciled them with the Peony Bouquet Stencil (Simon Says Stamp). I used Wilted Violet and Picked Raspberry Distress Oxide Inks. To add a little more interest, I used a white gel pen to color in the dots in the center of each flower.

I'm so excited to do these project with my colleagues!!

List of all stamps/dies/stencils used on this card:

  • Fancy Tag Topper Punch (Stampin' Up)
  • "Behind Every Successful Woman" cling stamp (Riley & Co.)
  • "Sweet Cluster" mini stamp set (Altenew)
  • Peony Bouquet Stencil (Simon Says Stamp)
Other supplies:
  • Neenah Desert Storm paper
  • Copic markers (various)
  • Double-sided tape / tape runner
  • White tassels
  • White Sakura Gelly Roll Pen
  • Distress Oxides: Wilted Violet and Picked Raspberry
  • Kraft gift bags (10.5" x 8" x 4.25")
  • Memento Tuxedo Black Ink
I hope you're having a fabulous day!

Tuesday, January 19, 2021

Valentine Card Kits

Last year, my boss asked me to create a team building event for our department retreat. I created cardmaking kits, and brought a huge box of embellishments, and everyone made two finished cards. Everyone loved the projects, and several people said it was the best part of the retreat! I'm also playing along with the Simon Says Stamp Wednesday Challenge: Layer It Up.

This year, my boss asked me to plan the event again, so I'm sticking to what I know. We're going to meet via Zoom (due to COVID), so I'm creating kits for each person. Everyone will make a "designer handbag" gift bag, a slimline card, themed for a Valentine or birthday, AND an A2-sized Valentine card. Last year, the team building element that was most successful was the time we spent playing with embellishments, creating our own designs, and then sharing our creations. I decided to replicate that as much as possible, even though we won't be in the same building.

Everyone will have all of the elements (plus a few more) and can either copy one of these designs or mix-and-match to create their own. 

Every participant (and yes, they're all women) will receive one of the kits below, and the kit includes all of the flowers, black and white die-cut hearts, three different papers, other embellishments, pearls, and foam squares (to pop something up).

This is what the kits look like. Each kit also includes a bottle of Ranger Multi-Medium Matte and a tape runner (not shown).

There are three backing papers they can use: a white-and-champagne shimmery checkered pattern, a black-and-white checkered pattern (not shown), or a blue plaid. I cut shimmery white and shiny black Hearts Entwined (My Favorite Things) for each kit. There are a ton of embellishments included from the Simple Stories: Simple Vintage My Valentine - Bits and Pieces ephemera pack. I was luck enough to pick up half a dozen of those packs for $1 each last year, so I had enough to fill all of the kits with identical pieces.

Here's an angled view of the cards, as the white-and-champagne shimmery checkered pattern doesn't photograph well from above:

I'm so excited to do this project with my colleagues!!

List of all stamps/dies/stencils used on this card:

  • Hearts Entwined Die-Namics (My Favorite Things)
Other supplies:
  • Simple Stories: Simple Vintage My Valentine - Bits and Pieces (ephemera pack)
  • Patterned cardstock (various)
  • Double-sided tape (Scor-tape)
  • Ranger Multi-Medium Matte 
  • Tape Runner
  • Foam squares 
  • White pearls (flat back)
Have a happy heart-filled day!

Sunday, January 17, 2021

Slimline Floral Valentine or Birthday Card

Last year, my boss asked me to create a team building event for our department retreat. I created cardmaking kits, and brought a huge box of embellishments, and everyone made two finished cards. Everyone loved the projects, and several people said it was the best part of the retreat! I'm also playing along with the Simon Says Stamp Wednesday Challenge: Layer It Up.

This year, my boss asked me to plan the event again, so I'm sticking to what I know. We're going to meet via Zoom (due to COVID), so I'm creating kits for each person. Everyone will make a "designer handbag" gift bag and a slimline card, themed for a Valentine or birthday. I've been working on the card kits for a week and a half, and they're finally done!

Every participant (and yes, they're all women) will receive one of the kits below, and the kit includes all of the elements needed to make one of these cards. She can choose which one to make, or mix and match elements, as the plaid layers (red or white) are separate, both die-cut and glittered sentiments are included, etc.

This is what the kits look like. Each kit also includes a bottle of Ranger Multi-Medium Matte and a tape runner (not shown).

These kits/cards were a LOT of work. It took me three days just to color the flowers (with Copics) and fussy cut them! I cut card bases, black cardstock panels, two plaid layers (red and white) for each person, red and white layers for INSIDE the cards, and then the sentiments (love you and happy birthday for each person). For the red "love you" sentiment, I also covered it with Sparkle n' Sprinkle Fire Engine Red Glitter, which took me another day. The Happy Birthday sentiment is die-cut from Silver Mirri Paper, which is beautifully sparkly (but a pain in the tuchus to carefully remove all of those fine, curly letters). Each kit also includes a small bag of the red flat-back pearls for embellishment.

Here's a close-up of the "love you" card:

It's hard to tell in the photo, but the sentiments are SO SPARKLY! I'm so excited to do this project with my colleagues!!

List of all stamps/dies/stencils used on this card:

  • Tall Flowers stamp set (Pink & Main)
  • Plaid Slimline Die (Pink & Main)
  • Lots of Love die (My Favorite Things)
  • All About You die (My Favorite Things)
  • Hand-Lettered Happy Birthday die (My Favorite Things)
  • Fancy Slimline Scalloped dies (Kat Scrappiness) - NOT SHOWN, used for the inside layers
Other supplies:
  • Black, white, and Poppy Parade cardstock (Stampin' Up)
  • Double-sided tape (Scor-tape)
  • Ranger Multi-Medium Matte 
  • Tape Runner
  • Silver Mirri Paper
  • Sparkle n' Sprinkle Fire Engine Red Glitter
  • Zig Glue Pen
  • Copic markers (various)
  • Red pearls (flat back)
Have a fabulous day!